Wednesday, December 29, 2010

I'm Still Here.......

Hope you all had a wonderful Christmas, I enjoyed a peaceful Christmas day with hubby and our sons.  Enjoying some down time and I plan to get back to more regular blogging after the first.  The next few days will be busy cleaning up and doing some cooking for New Year's Day, my family (parents, siblings and their families) will be celebrating our Christmas together on NYD.  My biggest challenge is cleaning the floor without a vacuum cleaner, my youngest son is going to look at it and hopefully he can fix it, if not I guess a new one will be in order (I would rather save the money or spend it on fabric, LOL).  The most important thing I need to remember is that I DON'T need to clean every single nook and cranny and exhaust myself in the process, my family is getting together to visit NOT inspect my house! 

After the first I am planning to get back into my sewing room, I am also doing the usual beginning of the year organizing, paperwork and hope to get it finished by the end of January.

Some thoughts of warmer days to come..........

Friday, December 24, 2010

Merry Christmas

"A Quiet Moment"
by
Timothy P. Schmalz
Merry Christmas

Sunday, December 19, 2010

All Ready For Santa to Deliver

Just took this out of the dryer and it's nice and soft and crinkled. 
 Ready to be delivered with these little goodies.
Straight from "Santa's Workshop".  I do have to say that this elf wishes she was better at machine quilting, but I don't think the 6 month old recipient will be too critical.  Actually it gave me incentive to work on quilting more to improve my skills, I already have two waiting in the wings. 
 Packaged for delivery.
Hope you are all able to enjoy this Christmas season, I've been trying to keep it simple and not get stressed.  My tree still doesn't have ornaments,  but I was able to get them down from the attic today.  Tomorrow I will be going out to pick up a few gift items then I can concentrate on groceries for the week and Christmas.  I'm hoping that the coming week will be quiet and uneventful :0). 

Sunday, December 12, 2010

Some Cinnamon Buns and a Quilt Sandwich

Today I made some of these..........
And this sandwich.........

I prefer the taste of the cinnamon buns and love the look of the sandwich, although the buns look nice too!  Thank you to the "girls" for the yummy eggs that I had with the buns.  Oh and one of them is really stepping up to the plate (no pun intended) and layed a pretty good sized egg this morning!

I also managed to get the tree in the house and now I have some lights up in the windows along with my snowmen.

 The plan this week is to get the lights on the tree and quilt the "sandwich".  Then when I can get back in the attic I can get the box with the ornaments down.  This is all apart  in my garage and  blocking access to the attic.
No this is not my project, but until it's out of the garage I won't be working on my compost bin, and at this rate I might have to wait until after Christmas.


Friday, December 10, 2010

A little decorating,,,,,,

I've done a little decorating.....
Top of the computer cabinet.
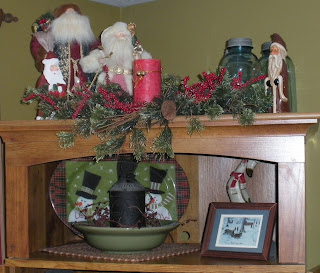
The shelf in the living room.
 
The ladder with the two quilt tops I made for my home.

The window over the kitchen sink, sorry it's a little "bright".
Hope to get a few more things up this weekend.

Wednesday, December 8, 2010

Busy in Santa's Workshop

Thought I would share the fun I've been having in Santa's workshop......

I placed a piece of the fabric I've chosen for the binding on the side and the backing will be the light blue fabric with the stars.  I will try to get the "quilt sandwich" made tomorrow and hopefully I will get the quilting finished by the end of the weekend if not sooner.  So I will have this one completed way before December 20th, when I have to bring it back to put it under the Christmas tree.   This quilt is the baby size of the Yellow Brick Road, the same design as the lap size I shared yesterday.   I really love this quilt design it's so quick and easy to cut and piece together.

Tuesday, December 7, 2010

I believe it's a "flimsy"

I believe I can officially call this "winter" quilt a flimsy.  I aplogize for the photos, the lighting wasn't that great, but I wanted to get this post done tonight.  Here is the completed top, I will probably save the quilting of this one for later, at least until after I get the next smaller quilt done. 

I am sure going to love snuggling under this quilt (when it's complete) this winter when I am reading some of the books from my pile.


Some Sewing........

I spent most of Sunday in my sewing room working on the winter quilt for my living room.   One of my favorite quick and easy quilt patterns is Yellow Brick Road by Terry Atkinson.


Some blocks pieces ready to be sewn together.

Just waiting their turns to be sewn.


Some more pieces that are waiting to be put together.


This is one of the three block designs in this quilt.

Here are the blocks waiting to be put on the design wall.


Adding another complete row to the top.
This quilt will be a "lap size" which for this pattern is 57" X 75", I will be adding a border and there are several extra blocks leftover and I may use them in the corners of the border as suggested in the pattern.  This quilt is so quick and easy that you could complete the top in one day.  I will be making one more this week for the "6 month old boy" gift tag that I picked off the Christmas tree at our local town hall. 

I know some of you are waiting to see the compost bin, haven't worked on it yet.........

Friday, December 3, 2010

Teamwork......

Today hubby and I decided to brave the chilly garage (the space heater was out of fuel and I didn't want to go out and get more) and get the roof for the chicken coop made.  This is what the coop roof was like this morning before we started.......
Their roof was a tarp with a thin piece of wood over the top, of course the temperatures are getting colder and  I also wanted a more secure roof that could be easily opened for cleaning.  So today was the day.....Hubby and I work together, he isn't able to physically do the job so he tells me what to do with the tools and materials and hopefully when we are done we have a finished product.  Thankfully we have been married for 26 years and have learned to work well together!

We had to buy a sheet of 1/2" plywood,  already had the hinges, roofing paper was leftover from a few years ago, and the rest of the wood was from "around" the house and yard.  Nails and screws are a "staple" at our house so we didn't need any of them either.  

We wanted the top to fit sort of like a box top, with a lip around the edges.  After measuring the top of the coop and adding a little for overhang in the front, we needed to cut the plywood, thankfully, "middle" son was over raking leaves (thank you) and came into the garage just in time to save me from having to use the skil saw (I have never used one before and really wasn't looking forward to it).

Now we need to mark where to put the first part of the "lip" for the top, after marking where to place it we started the screws then clamped the wood and finished screwing in the screws (sorry for lack of photos).  After getting the first board for the "lip" done we did the two sides the same way and carried it down to the coop for a "test fit".  It fit like a glove (after pulling out the nails from the top of the coop that were making it wobbly) then back to the garage to set on the hinges and put on the roofing paper.  Earlier this week we brought the paper inside the basement so it would be warm and easier to work with, but we had to work fairly quickly as it was cold in the garage.  The hinges are on the back side, we left extra paper to "overhang" the back and protect from possible drafts and tried to cover as much of the rest as possible. 

Then off to place it onto the coop and screw the bottom part of the hinges, oldest son helped with this part, thankfully because by this time my body was cold and stiff.  Voila a beautiful roof just in time for the yucky weather that is on the way for the weekend!  What do you think?? 

Of course while we were working on the roof I had to section the girls into a corner and somehow they managed to "get out", they sure do think the grass is greener on the outside, LOL.  I had to grab the dog and get him inside, I opened the pen so they could get back in but let them wander for a while....then later shooed them back into the coop!   I am making progress......I actually held one of them today, sorry I am still not quite up to speed with their names yet! 

I want to add a window to the left of the coop door so they will have some natural light on days that they have to stay inside, since I really don't plan on putting a "light" inside the coop, unless you think I should Peggy??  I was hoping to get the window done today but the roof took longer than expected, if there is a delay in the rain/snow tomorrow I will try to get it done in the morning.  I also want to figure out a better "yard area" for them, but not sure if it will get done this fall.....I will talk to hubby and see if we can build it in the garage and move outside when complete.  I would like a hinged door to get in and out and I would like to make fencing over the entire top (they have flown out several times before I covered the top).  Right now I have half chicken netting and half tarp because I ran out of netting.  If we redo this we will reuse the netting we already have and I think I will only have to get some strapping for the frame. 
Thursday, December 2, 2010

How Cute.....

On Saturday I went to my Fat Quarter Quilting group and started my next little quilt.  I was able to cut and piece the first square and when I measured the final product it was 1/4" too small all the way around :0(    Need to check out my portable machine, not sure if something is off with the 1/4" foot.  But anyways I went home and redid that block on my other machine and it came out great!  I was wondering what to do with the block that was too small but otherwise was fine.....well I remembered the cute little pin cushions that Terry makes (I was the lucky recipient of one in a giveaway) and decided I would use this block to make my first one! 

I started with the block, this one was 4 1/4"  square, then I took a piece from my scraps and made a 4 1/4" backing, sewed them RIGHT sides together leaving a space to turn it right sides out and fill.  I filled it with crushed corn cob, I wanted to use crushed walnut shells but wasn't able to find any locally.  After you fill then sew the opening shut and I used a button that I had for the middle.  What do you think?

I was hoping to get more done in the sewing room, instead I did some stuff around the house I even made some chocolate chip cookies!